Flexible, Freeform FrameFlow Tickets
A great ticketing system is essential to any IT monitoring software. Your organization needs to be able to identify, document, and assign issues in your monitoring environment to the right members of your IT staff. FrameFlow's ticketing system can help. It's robust and customizable while also being simple to use. This article will walk you through FrameFlow Tickets and how to use them.
Creating Tickets
Tickets can be triggered by event monitoring actions or created manually. By default, the status of new tickets will be "Open", but you can then navigate to the Tickets section of FrameFlow to adjust this and other aspects of the ticket. If the problem that triggered the initial alert for the ticket is resolved, that ticket will automatically close. This ensures that tickets generated for temporary or already-solved problems won't clog up your ticket feed and your team can focus on true problems.
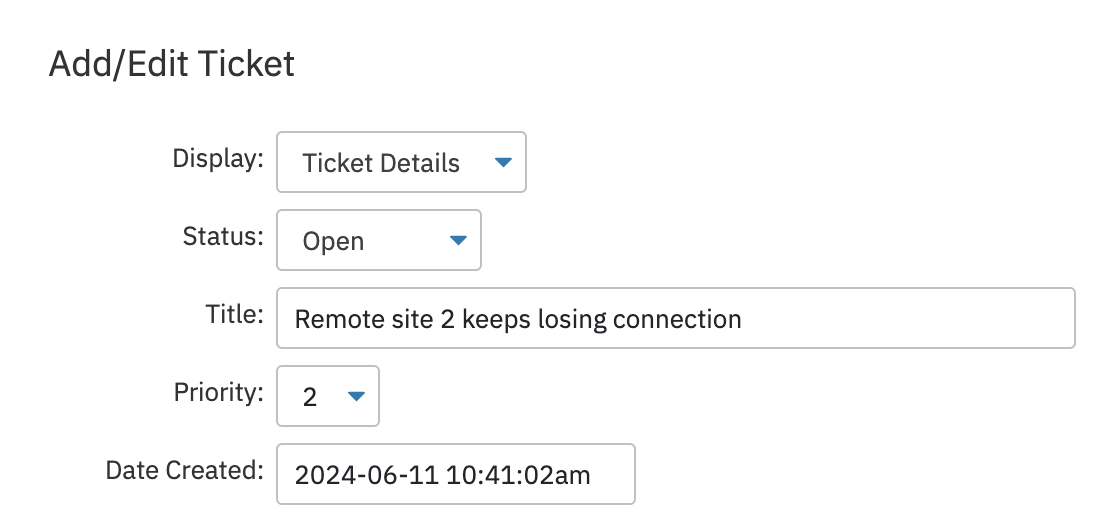 Creating a New Ticket Manually
Delegating IT Tasks with Tickets
From the Headquarters section, you can see all current monitoring issues in real-time. You can automatically create and assign tickets for these issues by using the "Assigned To" user icon next to the alert itself in Headquarters. Using this button, you can claim responsibility for the ticket yourself, notifying other members of your team that you're handling the problem. You can also use this button to assign the alert to another member of your team. This feature helps you delegate tasks to the relevant members of your team. It also helps ensure that attention is divided efficiently between every issue in your IT environment and no ticket gets left behind on the back burner.
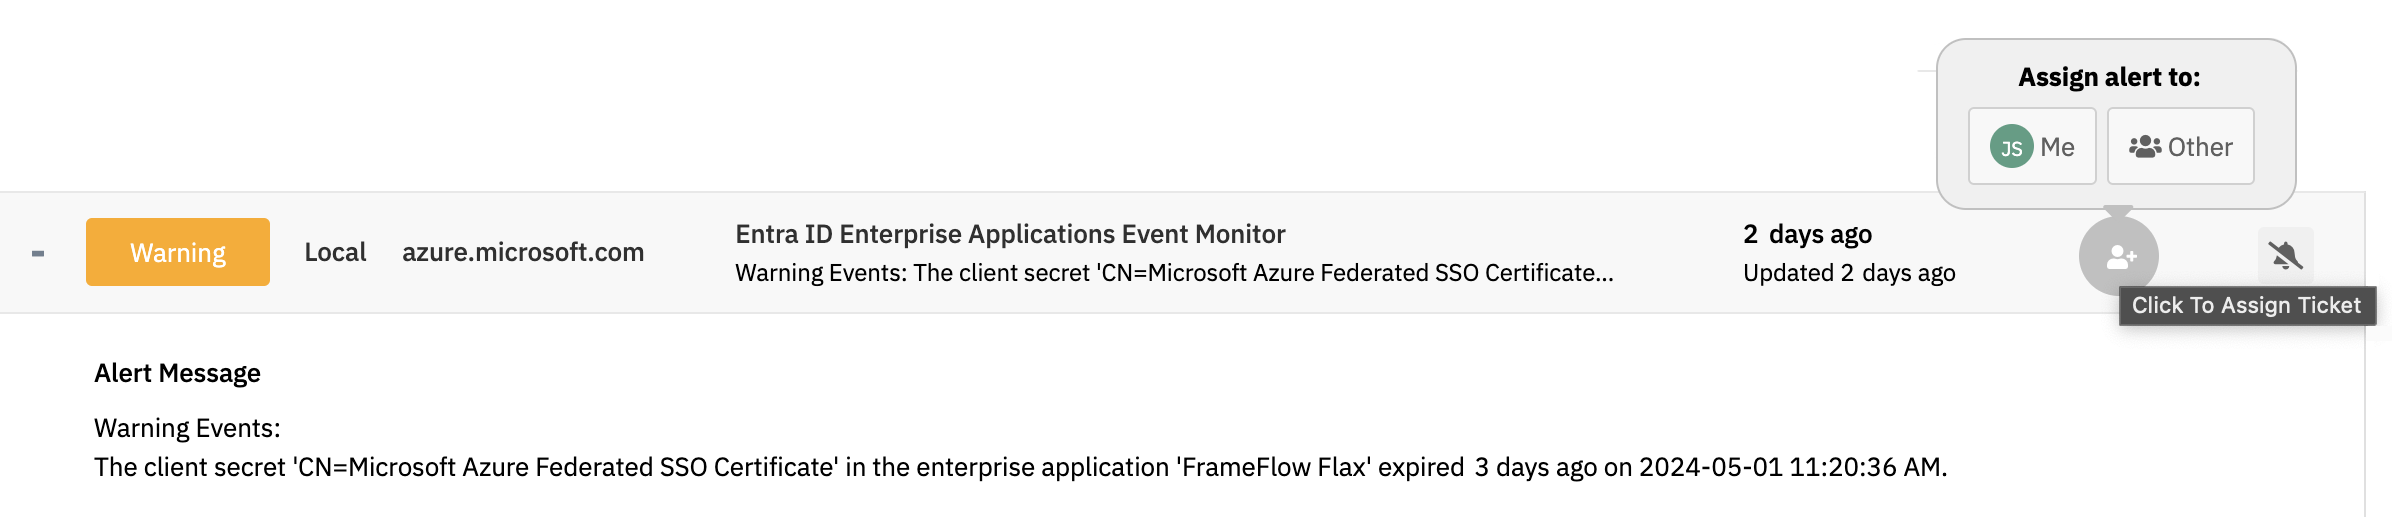 Assigning a Ticket from Headquarters
Recordkeeping with FrameFlow Tickets
FrameFlow tickets provide structure to assign tasks to your IT team, but that's not their only benefit. They also let you keep a history of actions that helps retain information on who did what and when. You can even update the status of a ticket partway through completion with new information using the "Add Status" button at the bottom of the "Edit Ticket" menu.
 Adding a Status to a Ticket
As we all know, sometimes an IT issue needs to go through multiple processes by multiple members of staff before being considered complete. Adding statuses along the way helps your team synchronize and complete the task faster. It can also save a lot of hassle when you need to retrace a ticket's paper trail to see the previously tried solutions of other users.
Speaking of previous tickets, FrameFlow keeps a history of tickets that you've closed. Imagine your IT team is faced with an issue that you've already dealt with in the past. By accessing the ticket history and viewing the timeline that led to the previous ticket's resolution, you can save tons of time solving it again. Depending on the issue, you can even use the data from the previous ticket to find a more permanent solution to this recurring issue.
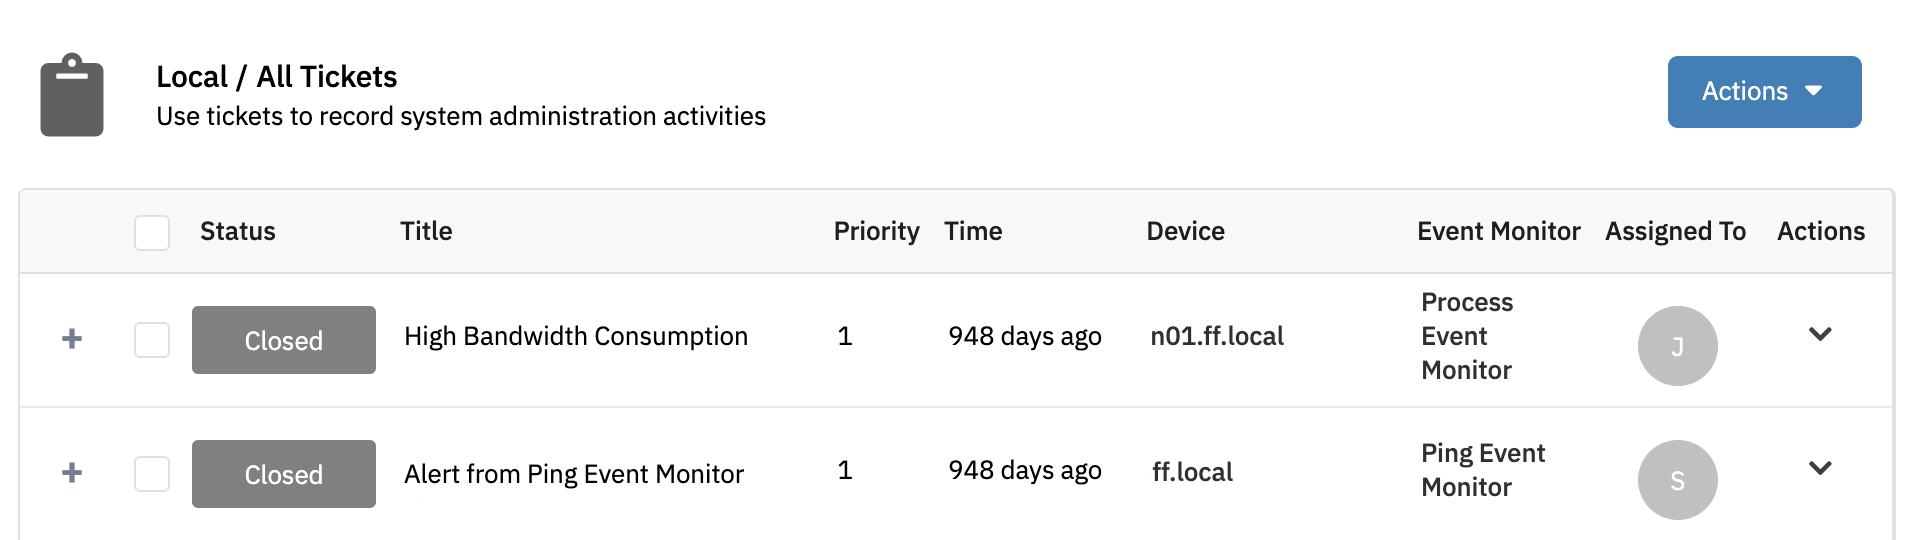 Viewing Old Tickets
Ticket Statuses
By default, ticket statuses are "Open". Any tickets that are automatically generated by your event monitors will have this status. Once you assign a ticket to one of your team members, they can change the status of the ticket to "In Progress" to indicate to the rest of the team that they're currently resolving the issue.
 Assigned Ticket Changed to "In Progress"
When the problem is resolved, you or another team member can close the ticket, removing it from the list of active tickets. Closed tickets, as we mentioned before, are still available to view in the Tickets section but will remain separate from active issues.
Ticket Timelines
The Actions menu next to each ticket lets you view the ticket's timeline. Once you do this, you'll be able to see the entire timeline of actions related to the ticket since it was created. This can include ticket creation and assignment, notes left by team members, and any status changes that happened to the ticket on the way to resolution. Users can even add, edit, and remove custom statuses to add further context to the ticket. Using the ticket timeline tool, you can view and manage the actions your IT team is taking to solve the ticket in real-time.
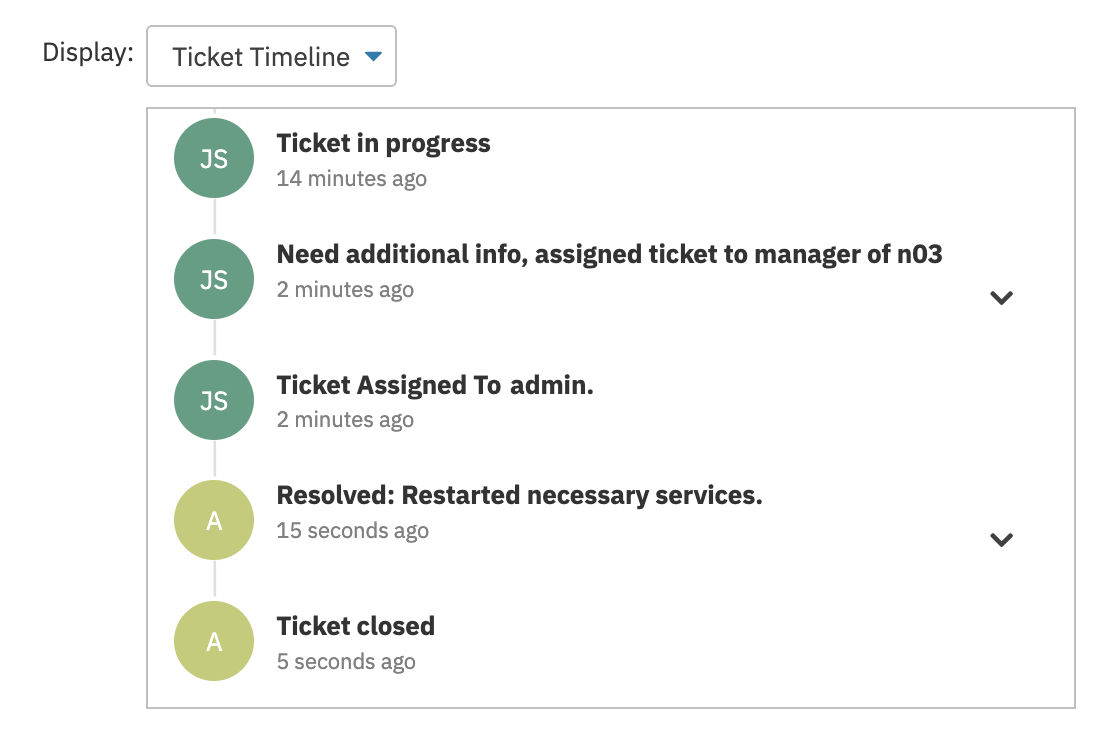 Timeline of Completed Ticket
Adding Custom Fields with Ticket Settings
In FrameFlow's Settings, there's a section specifically for ticket settings. Here, you can create custom ticket fields that will appear alongside the default ones in the settings for each ticket. Alongside the regular "Assigned To", "Due Date", and "Status" fields, you can create fields like "Department", "Contact Name", "Manager", or anything else that will help you further categorize your tickets. Once you create a custom field, it will be available in all existing and future tickets. Next to each custom field will be a text box to enter details in. Whenever you need to, you can return to the Ticket Settings to edit, delete, or rearrange your custom fields.
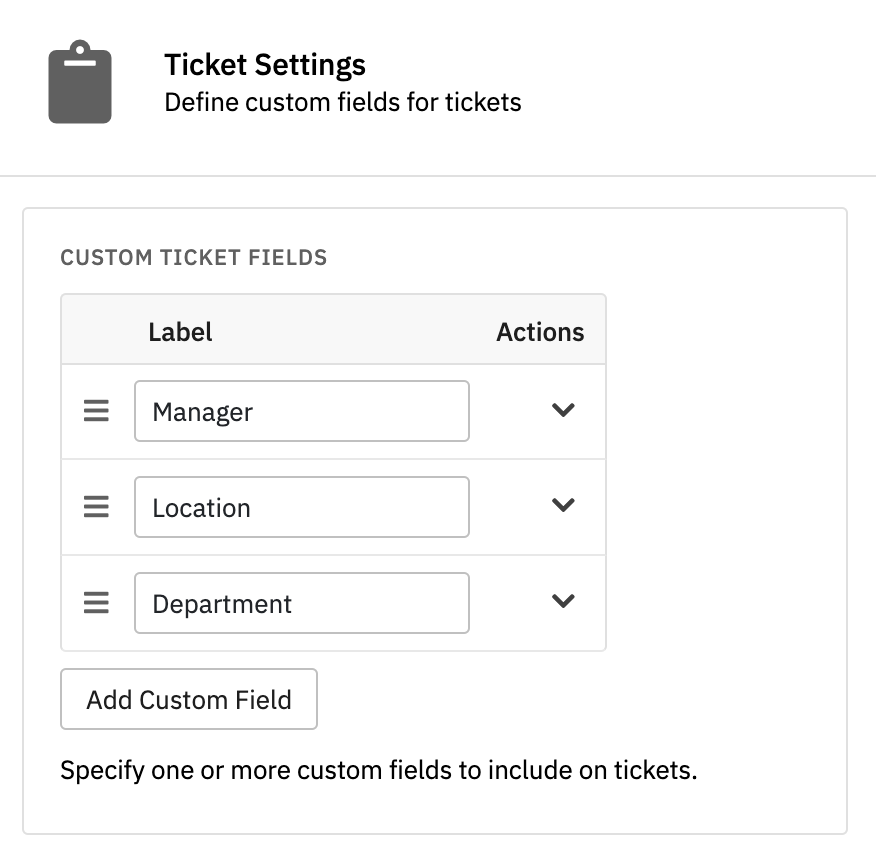 Ticket Settings
Summary
With all these customizable settings, how will you use FrameFlow tickets? As you can see, we've made sure our ticketing features can conform to the needs of any IT environment. Now that you know how extensible our tickets are, you can begin using them to assign and keep track of problems in your monitoring environment.
Are you new to FrameFlow? Download our free trial now to take it for a spin for free for 30 days and start taking advantage of its enterprise IT monitoring features.